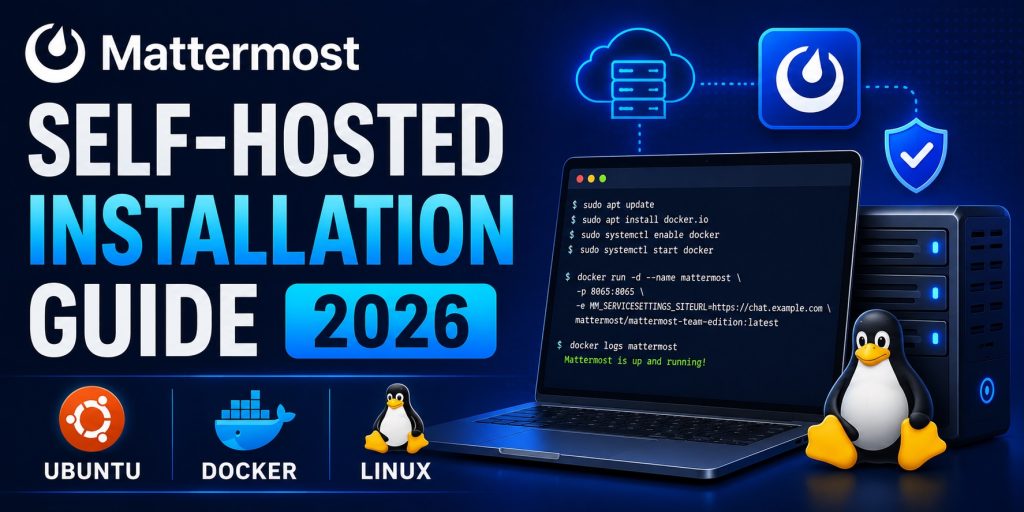
This guide walks through a complete Mattermost self-hosted installation from a blank Ubuntu server to a production-ready deployment with HTTPS, automatic SSL renewal, and proper data persistence. The method used is Docker Compose — the officially recommended approach for most deployments in 2026.
The same steps apply whether you are installing the free Starter tier or preparing a server for an Enterprise license. The only difference is the license file you upload at the end.
Time required: 30–45 minutes | Difficulty: Intermediate (Linux command line familiarity required)
What You Need Before Starting
| Requirement | Minimum | Recommended (production) |
|---|---|---|
| OS | Ubuntu 22.04 LTS | Ubuntu 24.04 LTS |
| CPU | 2 vCPU | 4 vCPU |
| RAM | 4 GB | 8 GB |
| Disk | 50 GB SSD | 100 GB SSD |
| Domain | A DNS A record pointing to server IP | Dedicated subdomain (e.g. chat.example.com) |
| Access | Root or sudo SSH | Non-root sudo user |
| Ports open | 80, 443 | 80, 443 (+ 8065 for direct access during setup) |
Users supported by this spec: The 2 vCPU / 4 GB configuration handles up to ~100 concurrent users comfortably. For teams of 200+, use 4 vCPU / 8 GB. For 500+ users, see the High Availability section at the end of this guide.
Step 1 — Prepare the Server
Start with a clean Ubuntu 22.04 or 24.04 server. Update all packages and install prerequisites:
sudo apt update && sudo apt upgrade -y
sudo apt install -y curl git wget gnupg2 ca-certificates lsb-release ufw
Configure the firewall
sudo ufw allow OpenSSH
sudo ufw allow 80/tcp
sudo ufw allow 443/tcp
sudo ufw enable
sudo ufw status
Install Docker Engine
Use Docker’s official installation script — do not use the Ubuntu-packaged version which is often outdated:
curl -fsSL https://get.docker.com -o get-docker.sh
sudo sh get-docker.sh
Add your user to the docker group so you don’t need sudo for every docker command:
sudo usermod -aG docker $USER
newgrp docker
Verify Docker and Compose are working:
docker --version
docker compose version
You should see Docker 24+ and Compose v2.x. If docker compose (with a space) returns an error, install the Compose plugin:
sudo apt install docker-compose-pluginStep 2 — Download the Mattermost Docker Repository
Mattermost maintains an official Docker Compose setup at github.com/mattermost/docker. Clone it into your home directory:
cd ~
git clone https://github.com/mattermost/docker
cd docker
Copy the sample environment file:
cp env.example .envThe repository contains:
docker-compose.yml— the main stack (Mattermost + PostgreSQL)docker-compose.nginx.yml— optional NGINX container with SSLdocker-compose.without-nginx.yml— use if you have an existing reverse proxy.env— all configuration lives here
Step 3 — Configure the .env File
Open the .env file for editing:
nano .envThe key variables to set:
# ── Domain ──────────────────────────────────────────────────
DOMAIN=chat.yourdomain.com          # Your actual domain/subdomain

# ── Mattermost ──────────────────────────────────────────────
MM_SERVICESETTINGS_SITEURL=https://chat.yourdomain.com
MM_USERNAME=mmuser
MM_PASSWORD=your_strong_db_password   # Change this
MM_DBNAME=mattermost

# ── PostgreSQL ──────────────────────────────────────────────
POSTGRES_USER=mmuser
POSTGRES_PASSWORD=your_strong_db_password   # Must match MM_PASSWORD
POSTGRES_DB=mattermost

# ── Paths ───────────────────────────────────────────────────
MATTERMOST_CONFIG_PATH=./volumes/app/mattermost/config
MATTERMOST_DATA_PATH=./volumes/app/mattermost/data
MATTERMOST_LOG_PATH=./volumes/app/mattermost/logs
MATTERMOST_PLUGINS_PATH=./volumes/app/mattermost/plugins
MATTERMOST_CLIENT_PLUGINS_PATH=./volumes/app/mattermost/client/plugins
MATTERMOST_BLEVE_INDEXES_PATH=./volumes/app/mattermost/bleve-indexes

# ── SSL (for NGINX container) ────────────────────────────────
CERT_PATH=./volumes/web/cert/cert.pem
KEY_PATH=./volumes/web/cert/key-no-password.pem
GITLAB_PKI_CHAIN_PATH=./volumes/web/cert/gitlab-ci.pem    # Leave blank if unused

# ── Mattermost version ───────────────────────────────────────
MATTERMOST_IMAGE=mattermost/mattermost-enterprise-edition
MATTERMOST_IMAGE_TAG=9.11       # Use latest stable — check hub.docker.com/r/mattermost
Important notes:
- Use
mattermost-enterprise-editionimage even for the free Starter tier — it starts in Starter mode and activates Enterprise features only when you upload a license file. - Generate a strong random password for
MM_PASSWORD/POSTGRES_PASSWORD:openssl rand -base64 24 - The
DOMAINvariable must be set before the containers start — NGINX uses it to request the SSL certificate.
Step 4 — Create Directories and Set Permissions
Mattermost runs inside the container as UID 2000. You must create the data directories with the correct ownership before starting:
mkdir -p ./volumes/app/mattermost/{config,data,logs,plugins,client/plugins,bleve-indexes}
sudo chown -R 2000:2000 ./volumes/app/mattermost
If using the NGINX container, also create the cert directory:
mkdir -p ./volumes/web/certStep 5 — Obtain an SSL Certificate
You have two options: use the NGINX container bundled in the repository (simplest), or use your own existing NGINX installation.
Option A — NGINX container with Let’s Encrypt (recommended for new servers)
The bundled NGINX container handles certificate issuance automatically on first start. Make sure your domain’s DNS A record is pointing to your server’s public IP before running this. Then start the full stack including NGINX:
sudo docker compose -f docker-compose.yml -f docker-compose.nginx.yml up -dOn first run, the NGINX container calls Certbot to issue a Let’s Encrypt certificate for your domain. Watch the logs to confirm:
docker compose logs -f nginxYou should see Successfully received certificate within 30–60 seconds.
Option B — Your own NGINX installation
Start Mattermost without the bundled NGINX:
docker compose -f docker-compose.yml -f docker-compose.without-nginx.yml up -dThen configure your host NGINX as a reverse proxy (see Step 6 below) and obtain a certificate with Certbot separately.
Step 6 — NGINX Reverse Proxy Configuration (Option B)
If you are managing NGINX yourself on the host, install it and Certbot:
sudo apt install -y nginx certbot python3-certbot-nginxCreate the Mattermost site config:
sudo nano /etc/nginx/sites-available/mattermostPaste the following — replace chat.yourdomain.com with your actual domain:
upstream backend {
    server localhost:8065;
    keepalive 32;
}

proxy_cache_path /var/cache/nginx levels=1:2 keys_zone=mattermost_cache:10m max_size=3g inactive=120m use_temp_path=off;

server {
    listen 80;
    server_name chat.yourdomain.com;
    return 301 https://$host$request_uri;
}

server {
    listen 443 ssl http2;
    server_name chat.yourdomain.com;

    ssl_certificate     /etc/letsencrypt/live/chat.yourdomain.com/fullchain.pem;
    ssl_certificate_key /etc/letsencrypt/live/chat.yourdomain.com/privkey.pem;

    ssl_session_timeout 1d;
    ssl_session_cache shared:SSL:50m;
    ssl_session_tickets off;
    ssl_protocols TLSv1.2 TLSv1.3;
    ssl_ciphers ECDHE-ECDSA-AES128-GCM-SHA256:ECDHE-RSA-AES128-GCM-SHA256:ECDHE-ECDSA-AES256-GCM-SHA384:ECDHE-RSA-AES256-GCM-SHA384;
    ssl_prefer_server_ciphers off;

    add_header Strict-Transport-Security "max-age=63072000" always;

    location ~ /api/v[0-9]+/(users/)?websocket$ {
        proxy_set_header Upgrade $http_upgrade;
        proxy_set_header Connection "upgrade";
        client_max_body_size 50M;
        proxy_set_header Host $http_host;
        proxy_set_header X-Real-IP $remote_addr;
        proxy_set_header X-Forwarded-For $proxy_add_x_forwarded_for;
        proxy_set_header X-Forwarded-Proto $scheme;
        proxy_set_header X-Frame-Options SAMEORIGIN;
        proxy_buffers 256 16k;
        proxy_buffer_size 16k;
        proxy_read_timeout 600s;
        proxy_pass http://backend;
    }

    location / {
        client_max_body_size 50M;
        proxy_set_header Connection "";
        proxy_set_header Host $http_host;
        proxy_set_header X-Real-IP $remote_addr;
        proxy_set_header X-Forwarded-For $proxy_add_x_forwarded_for;
        proxy_set_header X-Forwarded-Proto $scheme;
        proxy_set_header X-Frame-Options SAMEORIGIN;
        proxy_buffers 256 16k;
        proxy_buffer_size 16k;
        proxy_read_timeout 600s;
        proxy_cache mattermost_cache;
        proxy_cache_revalidate on;
        proxy_cache_min_uses 2;
        proxy_cache_use_stale timeout;
        proxy_cache_lock on;
        proxy_pass http://backend;
    }
}
Enable the site and obtain the SSL certificate:
sudo ln -s /etc/nginx/sites-available/mattermost /etc/nginx/sites-enabled/
sudo nginx -t
sudo certbot --nginx -d chat.yourdomain.com
sudo systemctl reload nginx
Certbot automatically modifies your NGINX config to include the certificate paths and sets up auto-renewal via a systemd timer.
Step 7 — Verify Containers Are Running
docker compose psYou should see three containers running: mattermost, postgres, and nginx (if using Option A), all with status Up. If any container shows Exit, check its logs:
docker compose logs mattermost
docker compose logs postgres
Common issues:
- Postgres fails to start: Permission issue on the volumes directory. Run
sudo chown -R 2000:2000 ./volumes/app/mattermostand restart. - Mattermost exits immediately: Check that
MM_SERVICESETTINGS_SITEURLstarts withhttps://and exactly matches your domain. - NGINX fails SSL: DNS not yet propagated. Wait 5–10 minutes and restart the NGINX container.
Step 8 — First-Run Setup in the Browser
Open your browser and navigate to https://chat.yourdomain.com. You should see the Mattermost setup wizard.
8.1 Create the System Admin account
The first account created on a new Mattermost instance automatically becomes the System Administrator. Use a dedicated admin email — not a personal address.
8.2 Create your first team
Give it a short, URL-friendly name. This can be changed later in System Console → Teams.
8.3 Configure SMTP (email notifications)
Go to System Console → Environment → SMTP and enter your mail server credentials. Mattermost requires working SMTP for password reset emails and team invitations. If you don’t have an SMTP server, use a transactional email service — SendGrid, Mailgun, or Brevo all have free tiers sufficient for small teams.
8.4 Set the Site URL
Confirm that System Console → Environment → Web Server → Site URL matches exactly what you set in the .env file. A mismatch here causes broken email links and WebSocket connection errors.
8.5 Configure push notifications
Go to System Console → Environment → Push Notification Server:
- For Starter/Professional (internet-connected): set to
https://push.mattermost.com - For air-gapped deployments: deploy the Mattermost Push Proxy on a separate server and point to it
Step 9 — Apply an Enterprise License (Optional)
If you have a Mattermost Enterprise license — obtained directly from Mattermost or via an authorized reseller like DoCrack — apply it now:
- Go to System Console → About → Edition and License
- Click Upload License File
- Select the
.mattermost-licensefile you received - Click Save
Enterprise features activate immediately — no restart required. You will see the license tier (Professional or Enterprise) and expiry date displayed in the System Console.
To obtain a Mattermost Enterprise license for teams in Iran or other restricted regions, contact DoCrack via Telegram: @DoCrackMe. Licenses are delivered within 24 hours.
Step 10 — Post-Installation Hardening
Enable automatic container restarts
Ensure containers restart automatically after a server reboot. In your docker-compose.yml, each service should have restart: unless-stopped — the official Mattermost docker-compose.yml includes this by default.
# Verify restart policy
docker inspect mattermost-mattermost-1 | grep RestartPolicy
Set up automated backups
Back up two things: the PostgreSQL database and the Mattermost data directory.
Database backup (run daily via cron):
docker exec mattermost-postgres-1 pg_dump -U mmuser mattermost | gzip > /backup/mattermost-db-$(date +%Y%m%d).sql.gzData directory backup:
tar -czf /backup/mattermost-data-$(date +%Y%m%d).tar.gz ./volumes/app/mattermost/dataConfigure log rotation
Docker logs can grow large. Add log rotation to your Docker daemon config:
sudo nano /etc/docker/daemon.json{
"log-driver": "json-file",
"log-opts": {
"max-size": "100m",
"max-file": "5"
}
}sudo systemctl restart dockerSSL certificate auto-renewal
If you used Certbot directly on the host (Option B), verify auto-renewal is active:
sudo certbot renew --dry-runIf you used the bundled NGINX container (Option A), the container handles renewal automatically via an internal cron job.
Upgrading Mattermost
To upgrade to a new Mattermost version, update the image tag in your .env file and pull the new image:
# Edit .env: change MATTERMOST_IMAGE_TAG to the new version
nano .env

# Pull and restart
docker compose pull
docker compose up -d
Always back up the database before upgrading. Mattermost runs database migrations automatically on first start with a new version — this is usually seamless but irreversible.
Check the Mattermost Changelog for breaking changes before upgrading across major versions (e.g. 9.x → 10.x).
High Availability Deployment (500+ Users)
For deployments above 500 concurrent users or where downtime is unacceptable, Mattermost Enterprise supports High Availability clustering. The architecture requires:
- 2+ application nodes — running the Mattermost container, behind a load balancer (NGINX, HAProxy, or a cloud LB)
- Shared file storage — an NFS share or S3-compatible object storage (MinIO works for self-hosted) that all nodes can access for uploaded files
- Dedicated PostgreSQL server — ideally with streaming replication for redundancy
- Redis or cluster message bus — for cross-node event broadcasting (configured in System Console → High Availability)
HA clustering requires a Mattermost Enterprise license. It is not available on Starter or Professional plans. Contact @DoCrackMe for Enterprise licensing options.
Get a Mattermost Enterprise License
Once your server is running, upgrading from Starter to Professional or Enterprise unlocks SSO, AD/LDAP, compliance exports, and for Enterprise — HA clustering and 24×7 support.
| Details | |
|---|---|
| License type | Genuine Mattermost Professional / Enterprise |
| Delivery | Within 24 hours of confirmation |
| Payment | Crypto (USDT TRC-20), international transfer |
| Support | Activation assistance included |
| Contact | Telegram: @DoCrackMe |
👉 Contact @DoCrackMe on Telegram — quote includes your seat count and deployment size.
Frequently Asked Questions
What are the minimum server requirements for Mattermost self-hosted?
For teams up to 100 users: 2 vCPU, 4GB RAM, 50GB SSD running Ubuntu 22.04 or 24.04. For 100–500 users: 4 vCPU, 8GB RAM, 100GB SSD. For 500+ users or high availability: multiple application nodes behind a load balancer, plus a dedicated PostgreSQL server. Mattermost officially supports PostgreSQL 13–16.
Can I install Mattermost on Docker?
Yes. Docker Compose is the officially recommended installation method for most self-hosted deployments. The official mattermost/docker repository provides a ready-to-use docker-compose.yml that includes Mattermost, PostgreSQL, and optional NGINX with automatic SSL.
Does Mattermost support PostgreSQL or MySQL?
Mattermost supports PostgreSQL only as of version 8.x. MySQL support was removed in Mattermost 8.0. For all new installations in 2026, use PostgreSQL 14, 15, or 16.
How do I apply a Mattermost Enterprise license after installation?
Go to System Console → About → Edition and License, click Upload License File, and upload the .mattermost-license file. Enterprise features activate immediately without a restart. Contact DoCrack via Telegram @DoCrackMe to obtain a license.
How do I enable push notifications for Mattermost self-hosted?
For internet-connected deployments, set the Push Notification Server URL to https://push.mattermost.com in System Console → Environment → Push Notification Server. For air-gapped deployments, deploy the open-source Mattermost Push Notification Service (MPNS) on your own server and point to it instead.
Get a license — free consultation
Pricing depends on version and number of users. Message us on Telegram and we’ll reply with an exact quote — no commitment required.
|
✓
20+ years experience
Software engineers with a long track record
|
⚡
Delivered within 24h
Your license is sent within one business day
|
↩
Money-back guarantee
If the license doesn’t work, we refund in full
|
Usually reply within a few hours — free consultation, no upfront payment