How to Install PVsyst 8 & Fix License Errors (Step-by-Step Guide 2025)
Are you facing the frustrating “Demo Mode” limitation after installing PVsyst 8? Or perhaps you are encountering unexpected license errors that prevent you from saving your solar power plant simulation projects? You are not alone. Many engineers and solar designers struggle with the activation process of this powerful software.
PVsyst 8 is the industry standard for photovoltaic systems design, but its strict licensing mechanism can be a hurdle. Whether you are a student trying to learn the basics or a professional designing a utility-scale solar farm, having full access to the software features is essential.
In this comprehensive guide, we will walk you through the installation process of PVsyst 8, explain how to safely apply the fix to remove the trial limitations, and troubleshoot common errors like “Access Denied” or “License File Not Found.”
Note: If you haven’t downloaded the software yet, please visit our dedicated page to [Download PVsyst 8 Full Version with License] first, and then return here for the installation tutorial.
Before We Start: System Requirements
Before attempting to install or troubleshoot, ensure your PC meets the minimum requirements to run PVsyst 8 smoothly. Solar simulations require significant processing power.
| Component | Minimum Requirement | Recommended |
| OS | Windows 10 (64-bit) | Windows 10 / 11 (64-bit) |
| Processor | Intel Core i3 or equivalent | Intel Core i5/i7 or newer |
| RAM | 4 GB | 8 GB or more |
| Graphics | Support for OpenGL 2.0 | Dedicated Graphics Card (NVIDIA/AMD) |
| Storage | 1 GB Free Space | SSD recommended for faster simulation |
Step 1: Important Preparations (Avoid False Positives)
This is the most critical step that many users skip, leading to failed installations.
Security software and Windows Defender often flag activation tools (patches, keygens, or modified DLLs) as potential threats. This is usually a “False Positive.” It means the antivirus detects the file structure as a “hack tool” but it is not necessarily a virus affecting your system.
To ensure the installation proceeds without your license files being automatically deleted:
-
Disable Real-time Protection: Go to Windows Security > Virus & threat protection > Manage settings and temporarily turn off “Real-time protection.”
-
Add an Exclusion: Alternatively, create a folder on your desktop (e.g., “Installers”), add this folder to the Exclusions list in Windows Defender, and extract your downloaded files there.
Pro Tip: Always download engineering software from trusted sources like Docrack.me to ensure the files are malware-free.
Step 2: Installing PVsyst 8 Core Files
Follow these standard steps to install the main software.
-
Extract the Archive: Use WinRAR or 7-Zip to extract the downloaded
.zipor.rarfile. -
Run Setup: Locate the
setup.exefile (orPVsyst-8.x.x-setup.exe) and run it as Administrator. -
Follow the Wizard:
-
Select your language (English is recommended).
-
Accept the License Agreement.
- Choose the installation folder. By default, it is usually:C:\Program Files\PVsyst8.0\
(Memorize this path, you will need it later).
-
-
Finish Installation: Once the progress bar reaches 100%, you will see a “Finish” button.
⚠️ CRITICAL WARNING: Uncheck the box that says “Launch PVsyst”. Do NOT run the program immediately after installation. If the program opens and connects to the internet before activation, it may lock the trial permanently.
Step 3: Activating PVsyst 8 (Fixing the License Error)
Now, let’s unlock the full potential of the software and remove the “Demo Mode” banner.
-
Locate the Fix Files: Go back to your extracted folder. You should see a folder named
Crack,Patch, orMedicine. Open it. -
Copy the Files: You will usually find a file named
PVsyst.exeor a specifically named.dllfile inside. Right-click on it and select Copy. -
Open Installation Directory:
-
On your desktop, right-click the PVsyst 8 shortcut.
-
Select “Open File Location”.
-
This will take you directly to the installation folder (e.g.,
C:\Program Files\PVsyst8.0\).
-
-
Replace the File: Right-click in an empty space within the folder and select Paste.
-
Confirm Replacement: Windows will ask if you want to replace the existing file. Click “Replace the file in the destination”.
-
If requested, grant Administrator permission.
-
Congratulations! You have successfully replaced the trial executable with the fully unlocked version.
Step 4: Troubleshooting Common PVsyst 8 Errors
Even if you followed the steps above, you might encounter some issues depending on your Windows configuration. Here are the solutions to the most common problems.
1. “Access Denied” or File Not Copying
If Windows refuses to paste the file into the Program Files directory:
-
Make sure PVsyst is not running in the background. Open Task Manager (
Ctrl + Shift + Esc), look for any PVsyst process, and click “End Task.” -
Try copying the file again.
2. Still in “Demo Mode” After Copying
If you open the software and it still says Demo Mode:
-
Your antivirus likely deleted the cracked file silently and restored the original one. Check your antivirus “Quarantine” or “Protection History,” restore the file, and add the installation folder to the exclusion list.
-
Repeat Step 3.
3. Connection Error or Update Warning
PVsyst might try to connect to the official server to validate the license or check for updates.
-
Solution: Never update the software directly from the app interface. Updating will overwrite the fix and revert it to Demo Mode.
-
Firewall Block: It is highly recommended to block PVsyst.exe in your Windows Firewall (both Inbound and Outbound rules) to prevent license revocation.
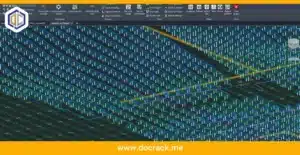
4. Graphics Glitches (OpenGL Error)
If the 3D shading scene is slow or crashing:
-
This is not a license issue. It is related to your graphics driver. Update your NVIDIA/AMD drivers to the latest version.
Conclusion
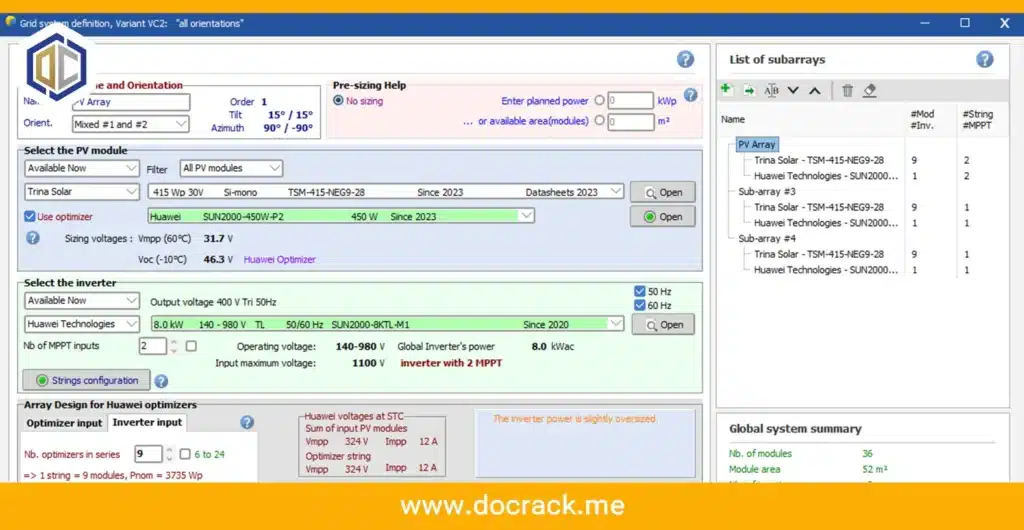
Installing PVsyst 8 correctly allows you to simulate grid-connected, stand-alone, and pumping systems without limitations. By following this guide, you ensure a clean installation free from license errors.
Remember, engineering software requires a stable environment. Always keep your antivirus configured correctly to avoid deleting essential activation files.
Ready to start your next solar project?
If you need other essential tools for solar design, check out our guide on [PVcase for AutoCAD] or explore alternatives like [SimaPro for LCA analysis].
Did this guide help you? If you are still facing specific error codes, drop a comment below with the error message, and our technical support team at Docrack.me will help you out.
(To buy this software at a reasonable price, send us a message on Telegram)
⇐ Telegram: t.me/DoCrackMe ⇒