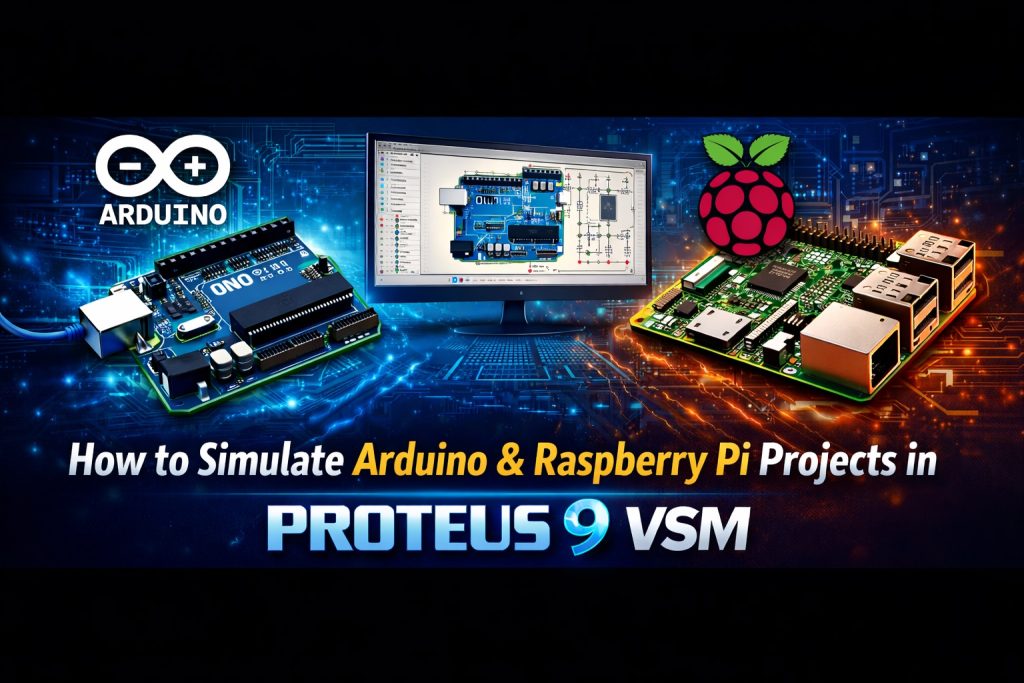
One of the most powerful — and most underused — features of Proteus 9 Professional is its Virtual System Modeling (VSM) engine. Unlike traditional circuit simulators that only handle passive components and op-amps, Proteus VSM lets you run actual firmware on a virtual microcontroller, watch LEDs blink, read sensor values, debug breakpoints in your code, and even build a full IoT interface — all without touching a single physical component.
In this guide you’ll learn exactly how to simulate Arduino and Raspberry Pi projects in Proteus 9, from the initial setup through to advanced debugging and IoT deployment. Whether you’re a student validating a circuit before a lab session, or a professional engineer saving time on prototype iterations, this workflow will become indispensable.
What Is Proteus VSM and Why Does It Matter?
Proteus VSM (Virtual System Modelling) was the first EDA product to bridge the gap between schematic design and embedded firmware development. Instead of treating your microcontroller as a black box in the schematic, VSM actually executes your firmware — the same hex or object file you would flash to the real chip — and co-simulates it alongside the analog and digital electronics connected to it.
The result is a complete virtual prototype. You can:
- Interact with the simulation in real time using virtual buttons, switches, and sliders
- Observe virtual LEDs, LCD displays, and seven-segment indicators responding to your code
- Use a virtual oscilloscope, logic analyser, I2C/SPI protocol analyser, and voltmeter
- Set breakpoints, single-step through code, and inspect variable values live
- Test edge cases and fault conditions that would be difficult or dangerous to replicate in hardware
This dramatically reduces the number of physical prototyping iterations and lets hardware and firmware engineers work in parallel — one on the PCB layout, the other debugging firmware on the virtual schematic.
Supported Platforms in Proteus 9
Proteus 9 VSM supports a wide range of microcontroller families and development platforms:
- Arduino — UNO, Mega, Nano, Leonardo, and more (AVR-based)
- Raspberry Pi — via Visual Designer for Raspberry Pi (Python/flowchart programming)
- Raspberry Pi Pico / Pico W — via VSM for MicroPython (RP2040)
- ESP32 / ESP32-S3 — via VSM for MicroPython
- PIC — extensive family support from Microchip
- AVR — ATmega, ATtiny families
- ARM Cortex — STM32 and other ARM-based controllers
- 8051 — classic 8-bit architecture
This guide focuses on the three most popular use cases: Arduino VSM, Raspberry Pi Visual Designer, and MicroPython VSM for Pico/ESP32.
Part 1: Simulating Arduino Projects in Proteus 9
Step 1 — Install the Arduino Library for Proteus
Proteus 9 Professional includes native AVR microcontroller models. To work with Arduino board models specifically (UNO, Mega, Nano, etc.), you need the Arduino library files installed.
- Download the Arduino Proteus Library (available from community repositories — search for Proteus Arduino Library on GitHub).
- Extract the archive and locate the
.LIBand.IDXfiles. - Copy them into your Proteus library folder, typically:
C:\Program Files\Labcenter Electronics\Proteus 9 Professional\LIBRARY - Restart Proteus. The Arduino boards will now appear in the component picker.
Note: If you are using the Proteus VSM for Arduino product (the dedicated add-on), the Arduino models are already included and no manual installation is needed.
Step 2 — Create a New Project and Place Your Arduino
- Open Proteus 9 and create a new project (File → New Project).
- Select a schematic template and skip the PCB layout step for now.
- In the ISIS schematic editor, press P to open the component picker.
- Search for Arduino UNO and place it on the schematic.
- Add any components your project needs — LEDs, resistors, sensors, displays — and wire them up to the Arduino’s GPIO pins exactly as you would in real hardware.
Step 3 — Write and Compile Your Arduino Sketch
- Open the Arduino IDE on your PC.
- Write your sketch as normal.
- Before compiling, enable hex file output: go to File → Preferences and tick “Show verbose output during compilation”. This reveals the path where Arduino saves the compiled
.hexfile in a temp folder. - Compile the sketch (Sketch → Verify/Compile). Note the output path — it will look something like:
C:\Users\YourName\AppData\Local\Temp\arduino_build_XXXXXX\sketch.ino.hex - Copy the
.hexfile to a convenient location such as your project folder.
Step 4 — Load the Hex File into the Virtual Arduino
- In Proteus, double-click the Arduino UNO component on the schematic. The component properties dialog opens.
- In the Program File field, browse to and select your compiled
.hexfile. - Set the clock frequency to match your Arduino (typically 16MHz for the UNO).
- Click OK.
Step 5 — Add Virtual Instruments and Run the Simulation
- From the left toolbar in ISIS, select the Virtual Instruments mode (oscilloscope icon).
- Add instruments as needed — oscilloscope, logic analyser, serial terminal, voltmeter.
- Connect them to the relevant pins on your schematic.
- Press the Play button (▶) at the bottom of the screen to start the simulation.
- Your Arduino sketch will begin executing. LEDs will light up, displays will show values, and instruments will respond in real time.
Step 6 — Debug Your Firmware
This is where Proteus truly shines over any other EDA tool. While the simulation is running:
- Open the Debug menu to access the code window.
- Set breakpoints on specific lines of your sketch — the simulation will pause when that line is reached, freezing the entire virtual circuit.
- Use single-step execution to advance one instruction at a time and watch the schematic respond.
- Inspect variable values and register states in real time.
- Identify whether a problem is in the hardware design or the firmware logic.
Practical Example: Blinking LED with PWM Control
A classic starting project: place an Arduino UNO, connect an LED with a 220Ω resistor to pin 9 (PWM-capable), and load a sketch that fades the LED using analogWrite(). Attach a virtual oscilloscope to pin 9. When you run the simulation, you’ll see the PWM waveform changing duty cycle in sync with the LED brightness on screen — instantly confirming your circuit and code are both correct.
Part 2: Simulating Raspberry Pi Projects in Proteus 9
Raspberry Pi simulation in Proteus works differently from Arduino. Because the Pi runs a full Linux OS, Proteus does not simulate the operating system itself. Instead, Visual Designer for Raspberry Pi simulates the Pi’s role as an embedded controller — GPIO interactions, attached HATs, shields, and sensors — while abstracting away the OS layer.
Step 1 — Use Visual Designer for Raspberry Pi
- Open Proteus 9 and create a new Visual Designer project.
- Select Raspberry Pi as your target platform.
- The Visual Designer IDE opens alongside the schematic editor.
Step 2 — Add Hardware from the Peripheral Gallery
The Peripheral Gallery is one of Visual Designer’s most time-saving features. It contains dozens of ready-made circuit blocks corresponding to real Raspberry Pi HATs, Grove modules, and breakout boards:
- Adafruit 16-Channel PWM Servo HAT
- Adafruit Stepper Motor HAT
- Adafruit DC and Stepper Motor HAT
- Pimoroni Automation HAT
- DHT11/DHT22 temperature and humidity sensors
- OLED and LCD displays
- Relay modules, servo controllers, and more
Simply click a peripheral in the gallery and Visual Designer automatically places the correct schematic circuitry and connects it to the Pi’s GPIO header. No manual wiring needed.
Step 3 — Program with Flowcharts or Python
Visual Designer offers two programming modes:
- Flowchart mode: Drag and drop logic blocks (methods, decisions, delays, assignments) onto a visual flowchart canvas. Ideal for beginners and teaching environments.
- Python mode: Write standard Python code directly in the VSM Studio editor. Visual Designer can convert any flowchart to Python, making the transition to code-level programming natural.
Important: Proteus simulates the Pi’s GPIO and peripheral interactions, but does not simulate Linux file I/O, GUI layers, or OS-level calls. Stick to hardware control code for best results.
Step 4 — Simulate and Debug
- Press the Play button to launch the simulation.
- Interact with virtual hardware in real time — click virtual buttons, observe LEDs and displays.
- Use breakpoints and single-step at both flowchart level and Python source level.
- Add oscilloscope probes and logic analysers to GPIO pins to observe signal timing.
Step 5 — Deploy to Physical Hardware
Once your design is verified in simulation, Visual Designer lets you deploy directly to the physical Raspberry Pi with a single mouse click. The same flowchart or Python program that ran in simulation transfers to the real hardware — and because it was already validated, it typically works first time.
Part 3: MicroPython Simulation — Raspberry Pi Pico & ESP32
Proteus 9 introduced dedicated VSM for MicroPython support, targeting the increasingly popular MicroPython ecosystem. Supported boards include:
- Raspberry Pi Pico and Pico W (RP2040)
- Maker range Pico variants
- Nano ESP32
- ESP32-S3-DEVKITC-1
How It Works
- Create a new project in Proteus 9 and select a MicroPython target board from the component picker (e.g., Raspberry Pi Pico).
- Add peripherals from the gallery — sensors, displays, motors — or wire custom electronics directly on the schematic.
- Write your MicroPython code in VSM Studio, the integrated code editor inside Proteus.
- Press Play. The RP2040 (or ESP32) processor model on the schematic executes your MicroPython program, interacting with all connected peripherals in real time.
- Use the integrated MicroPython debug console with live REPL access during simulation — type commands and see responses from the virtual hardware.
- Single-step through your MicroPython code, inspect variables, and add instruments to probe signals.
Practical Example: Pico UART Communication
A useful demonstration of MicroPython VSM: place a Raspberry Pi Pico on the schematic, connect two virtual terminals to UART0 and UART1 (GPIO 0/1 and GPIO 4/5), and write a MicroPython script that receives data on UART1 and forwards it to UART0. Run the simulation — type text into Terminal 1 and watch it appear instantly in Terminal 2. This validates your UART pin mapping, baud rate configuration, and firmware logic entirely in software before ordering a single PCB.
Part 4: Building IoT Projects with Proteus IoT Builder
Proteus 9 includes an IoT Builder add-on that extends Visual Designer to support full end-to-end IoT workflows. It lets you design a remote user interface — with buttons, dials, charts, message logs, and displays — that connects to your Arduino, Raspberry Pi, or MicroPython appliance over Wi-Fi via a built-in micro web server.
IoT Builder Workflow
- Design the hardware: Add shields, HATs, and sensors from the Peripheral Gallery in Visual Designer.
- Build the front panel: In the IoT Builder editor, drag UI controls (switches, knobs, charts, login screens) onto a virtual mobile interface canvas.
- Bind UI to hardware: Connect front panel controls to hardware actions using Visual Designer flowchart blocks or Arduino C / Python method calls.
- Simulate the full system: Press Play — both the firmware and the IoT front panel are simulated together. Click virtual buttons on the UI and watch the schematic respond.
- Deploy: Transfer to physical hardware. The IoT front panel is served to any mobile device or browser by the micro web server running on the appliance.
IoT Builder also supports MQTT for building multi-appliance systems, and includes access control with login/logout events — useful for teaching IoT security principles.
Virtual Instruments: Your Software Test Bench
Proteus 9 ships with a complete suite of virtual measurement instruments, all usable during simulation without any physical hardware:
- Digital Storage Oscilloscope (DSO) — observe waveforms, measure frequency and duty cycle
- Logic Analyser — capture and decode digital signals across multiple channels
- I2C Protocol Analyser — decode I2C bus traffic in real time
- SPI Protocol Analyser — decode SPI communication
- Virtual Serial Terminal — communicate with the MCU over a simulated UART
- Voltmeter / Ammeter — measure DC and AC levels anywhere in the circuit
- Signal Generator — inject test signals into your design
- System Scope (new in Proteus 9) — live probe wires placed anywhere on the schematic during a running simulation, no pre-placed component needed
Tips for Getting the Best Results from VSM Simulation
- Use object files, not just hex files: When possible, point Proteus to the compiler’s object/debug file rather than just the hex. This gives Proteus access to symbol names and line numbers, enabling source-level debugging with variable inspection.
- Match clock speeds: Always set the simulated MCU clock frequency to match your real hardware (e.g., 16MHz for Arduino UNO, 133MHz for Raspberry Pi Pico).
- Use the System Scope: In Proteus 9, the new System Scope lets you probe any wire live during simulation — drag a probe anywhere and see the waveform instantly, without stopping the simulation.
- Simulate before you solder: Use VSM to test edge cases — what happens if a sensor returns 0? What if a button is held for 5 seconds? These tests are free in simulation and expensive in hardware.
- Leverage Visual Designer for education: The flowchart editor makes it easy to introduce students to programming logic before they write a single line of code.
Frequently Asked Questions (FAQ)
Can Proteus 9 simulate any Arduino sketch?
Proteus VSM can simulate any Arduino sketch that targets AVR microcontrollers (UNO, Mega, Nano, etc.). Sketches using hardware-specific libraries that depend on real peripherals (e.g., actual Wi-Fi chip drivers) may require workarounds or virtual peripheral models.
Do I need the Arduino IDE to use Arduino VSM in Proteus?
You need the Arduino IDE (or another AVR compiler) to compile your sketch into a .hex file. The hex file is then loaded into Proteus. Alternatively, the Proteus Visual Designer for Arduino includes its own flowchart-to-hex compilation pipeline.
Can Proteus 9 simulate the full Raspberry Pi Linux environment?
No. Proteus simulates the Pi’s role as an embedded controller — GPIO, connected HATs, and peripherals. It does not simulate the Linux operating system, file system, or desktop GUI. Programs using GPIO and hardware interfaces work well; OS-level calls do not.
What is the difference between VSM for Arduino and Visual Designer for Arduino?
VSM for Arduino is the core simulation engine — it executes hex files and provides debugging tools for advanced users writing C++ code. Visual Designer for Arduino adds a flowchart-based programming environment and Peripheral Gallery on top of VSM, making it ideal for beginners and educational use.
Does Proteus 9 support ESP32?
Yes, via VSM for MicroPython. Supported ESP32 boards include the Nano ESP32 and ESP32-S3-DEVKITC-1. Native Arduino-framework ESP32 simulation (using the Arduino IDE with ESP32 boards) is not currently supported — MicroPython is the recommended path for ESP32 simulation in Proteus.
Can I simulate an IoT project end-to-end in Proteus before deploying to hardware?
Yes. Using Proteus IoT Builder alongside Visual Designer, you can simulate the complete system — firmware, electronics, and the remote mobile front panel — before writing a single line of deployment code. Once validated, deploy to physical hardware with one click.
برای خرید این نرم افزار با قیمت مناسب می توانید با پشتیبانی سایت تماس بگیرید و یا در تلگرام پیام دهید
(To buy this software at a reasonable price, send us a message on Telegram)
⇐ تلگرام: t.me/DoCrackMe ⇒
⇐ تلفن تماس: 09368059613 ⇒